We’ll fix it in post! This is the often lamented phrase on set, but for some things, that is exactly where you end up making the difference. You certainly want to get things right in-camera, but the final look is often created in post by video color correction and grading.
Why color correct and grade my videos?
Simply put, you want to color correct your videos to make them look the best they can and color grade them to add a certain aesthetic, like the teal and orange look you see in many films. Color has a big impact on how a viewer experiences your video and can even create a specific mood the director wants. DaVinci Resolve is a professional color grading solution used in many Hollywood productions that can help you achieve the look you want, whether it's a commercial or film look.
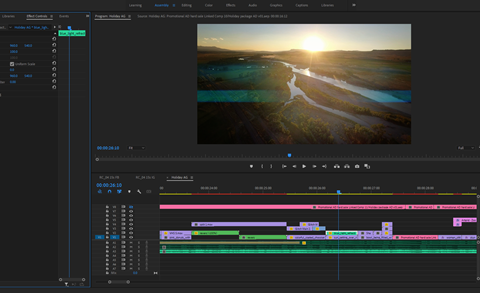
Color Page layout
Let’s start by looking at the Color Page layout in DaVinci Resolve 17 and what tools we will use for video color correction.
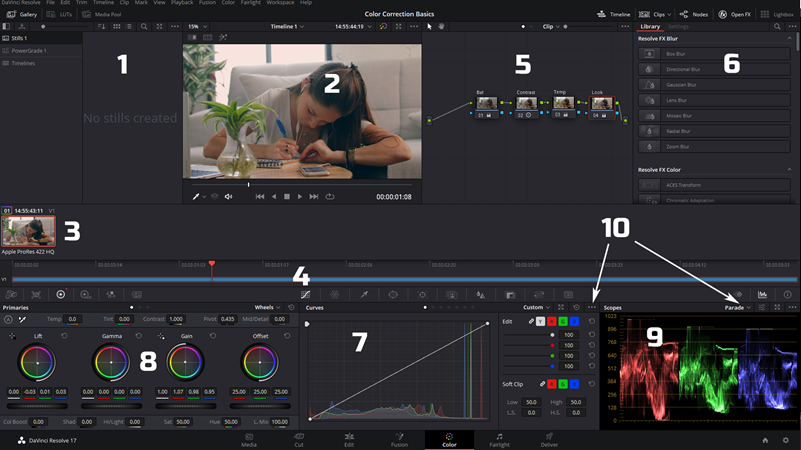
1. Stills Gallery/LUTs/Media Pool
The stills gallery is where your stills are stored. You can use stills to copy color corrections and grades to other clips. Use the tabs to open the LUTs and Media Pool panels. LUTs (Look Up Tables) are used to apply pre-made looks to footage or transform footage to a specific color space. The media pool is where you can access your project media.
2. Viewer
This is where you can see the results of your video color corrections as you make them. For a bigger view, press ‘Ctrl/Cmd + F’ to go full screen.
3. Clips
These are thumbnails of the clips in your timeline that provide a quick visual representation as well as providing some basic information about the clip itself and if any color corrections have been applied. You can hide the clips panel if you need to by pressing on the button at the top, or you can filter them using the dropdown menu. There are many filter options to help you with big projects.
4. Timeline
This is a full representation of the clips in your timeline that allows you to quickly scroll through and find different clips. Like the clips, the timeline can be revealed or hidden by pressing the button on the top right.
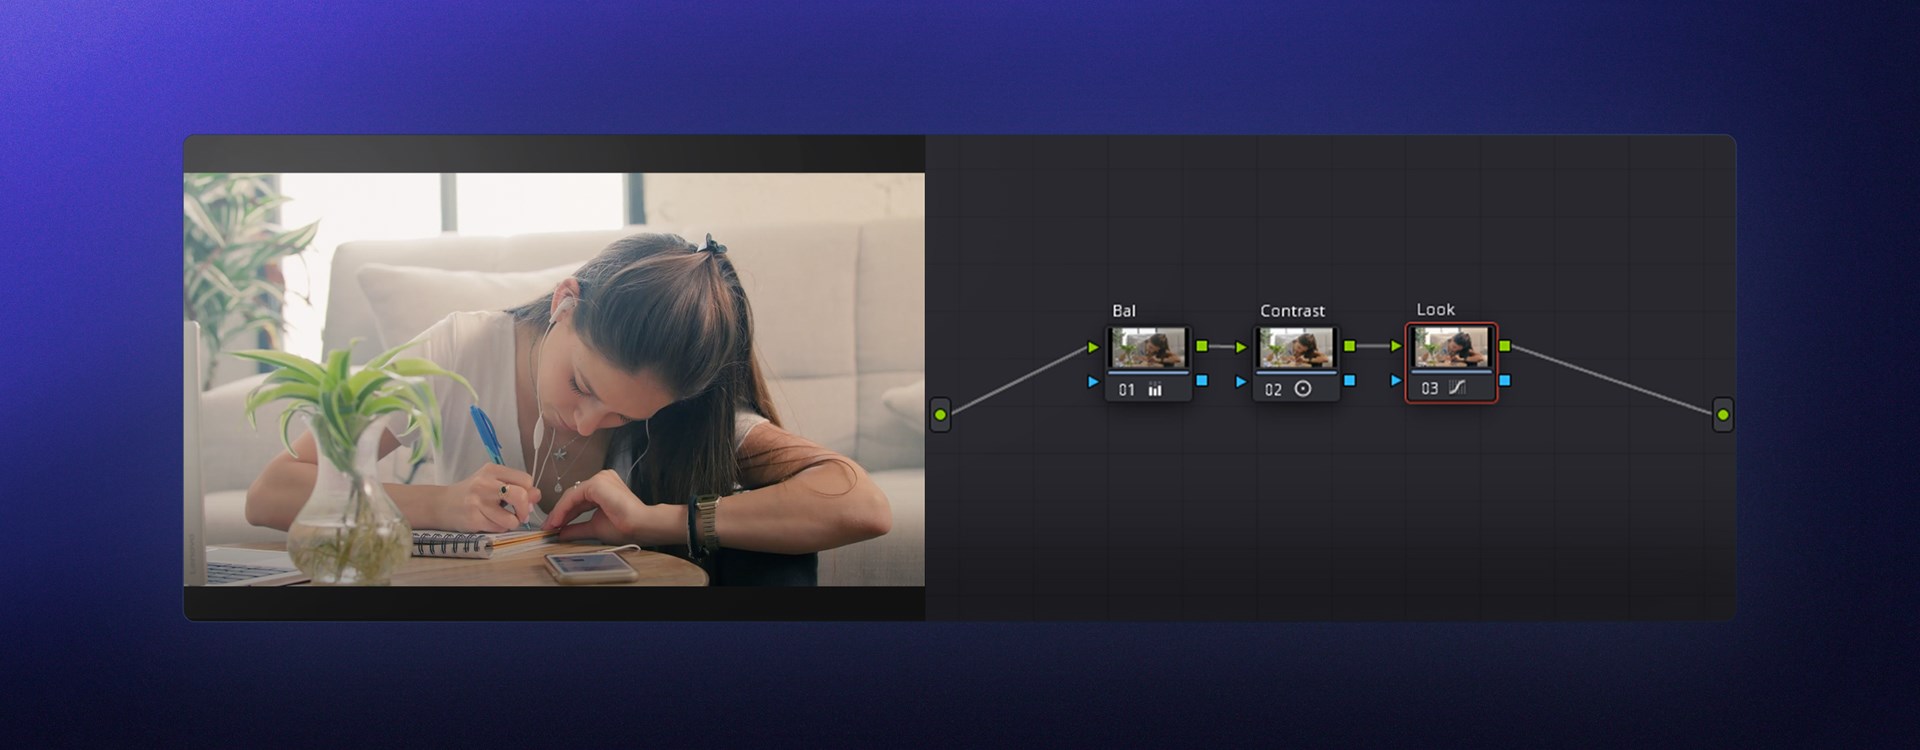
5. Node Editor
This is where the magic happens. Your color corrections are applied on nodes that form a node tree, the output of which becomes your final image. Data flows from left to right, and you can add many kinds of nodes.
6. Open FX/Lightbox
Open FX gives you access to many useful visual effects built into DaVinci Resolve, along with any FX plugins you may have added. The lightbox is just a quick visual overview of all the clips in your timeline.
7. Curves
Curves are a key tool in your DaVinci Resolve color correction and grading arsenal. There are 7 curves in total that combine to make a very powerful color grading toolset.
8. Primary Wheel/Bars
One of the main panels you will use for color correcting video. This panel consists of the primary wheels, bars and log wheels, as well as the new HDR wheels, RGB mixer, RAW settings and motion effects like noise reduction and motion blur.
9. Scopes
This is where you monitor what you are doing to your video and forms - the basis of how to color correct video. Watch your scopes! There are a few scopes - Parade, Waveform, Vectorscope, Histogram and Chromaticity. You can also find your keyframes here.
10. Options Menus - Additional controls or tools
Each panel has a bunch of menus that allow you to access different functions and tools, from right-clicking contextual menus to dropdown boxes and expanded menus. Have a look through them to see what each offers.
Basic color correction and grading
Now let's look at the basics of how to color correct and grade a video clip. The stock video clip was shot with a log profile, which means its dynamic range is compressed, and the image looks very flat. It is common to use log profiles or raw footage for color grading as this preserves the most data. It’s a bit like a .jpg photo vs. a raw photo. You can do so much more with the raw file. If you are color correcting video filmed with a standard camera profile and filmed in 8 bit with a low data rate, you will see the footage fall apart after minimal adjustment since there is just not enough data.
Primary Grading refers to color correction and grading that affects the entire frame, and this is what we will be doing. Secondary Grading affects only certain parts of the frame by using windows or keys, but we won’t cover that here.
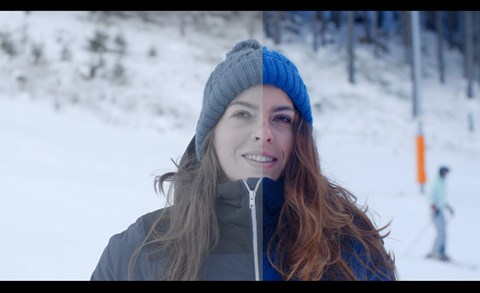
This is the HD preview version of the clip, taken from the story 'Modern Woman Lifestyle', shot by Omri Ohana:
And this is the Log version:
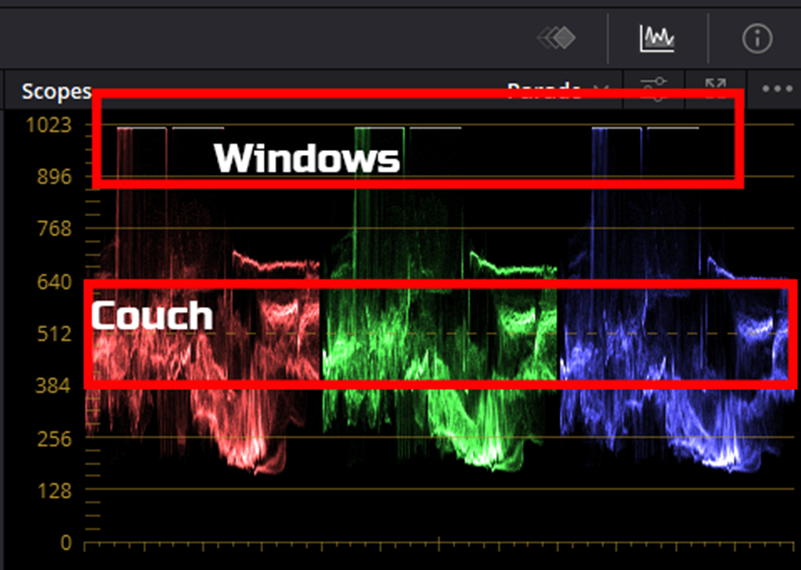
Normalization
Before starting, have a look at what is in your frame and imagine what it should look like. Context is very important. In this image, we see it was filmed indoors, and it looks like daylight is coming in from the windows. If we look at the scopes, we can see that the windows are somewhat overexposed, probably intentionally, so we know that we can keep those bright and use the lift wheel to lower the dark parts of the image and bring the blacks closer to black without crushing them. Now use the gain wheel to drop the bright parts slightly just to ensure there is no clipping. The image still lacks color, so we can bring up the saturation to around 75. It already looks much better.
White balance
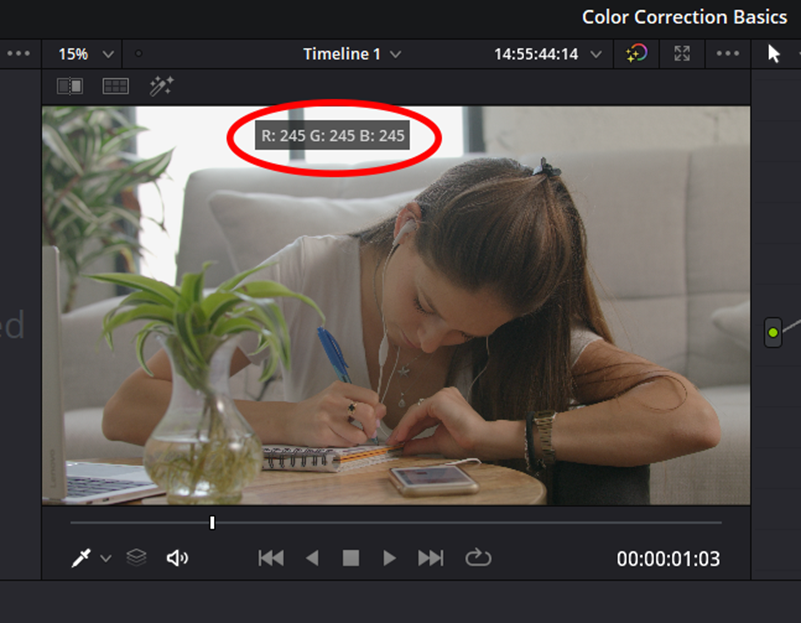
Sometimes images have a color cast, often due to incorrect white balancing during filming that can be caused by several factors. In this image, we expect the couch and shirt to be white, as well as the windows. If we look at the scopes, we can see the RGB parades line up well in those areas, so we will not need to make an adjustment. The white balance is correct. If you need to make modifications, you will use the primary bars or curves to make the necessary changes to get a perfectly balanced image. This usually involves finding something white or neutral and lining up those parts of the RGB parade. You can use the color picker with its RGB value displayed to check the RGB values of white and neutral parts to help you make adjustments.
Contrast
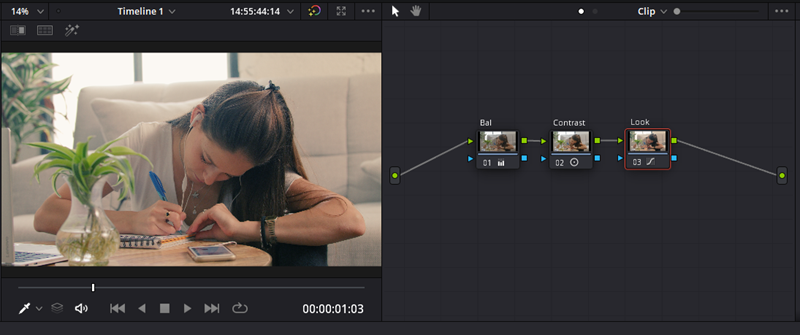
The image is still a little flat, so it needs a bit more contrast. We could add this in the same node, but we will add a serial node specifically for this adjustment. It is good to get in the habit of using new nodes for adjustments and labeling them to easily understand the adjustments you have made and quickly change individual parts of the overall color correction and grade. Color correction and grading is an iterative process, and you will often need to go back and adjust something. In addition, changing one thing can affect other areas in undesired ways, so constant tweaking is required frequently.
Let’s increase the contrast. If this brightens the bright parts in your video too much, you can use the pivot function to adjust where the contrast is applied. If we increase the pivot value, the contrast is moved more towards the darker parts of the image, and if we lower it, the contrast will be applied more toward the brighter parts. Again, the aim is a natural look that you would expect in the scene.
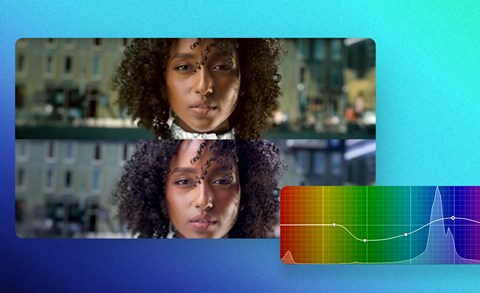
Creative looks (Grades)
We have now color corrected the image to have a natural look. We could stop here if that is what we wanted. However, you often want to create a unified, unique look to match the mood of your video or the style of your brand. So let’s add a quick, creative cross-process look. Add a new serial node and label it.
This time we will use the curves to make the adjustment. First, unlink the RGB curves and select the Red curve. Now give this a slight S curve adding red to the highlights and removing it from the shadows. Now select the Blue curve and do the reverse. You are removing blue from the highlights and adding blue to the shadows. Be careful not to overdo it. Subtle can be very effective, but in the end, it is up to your personal taste.

There you go. That’s how to do color correcting in DaVinci Resolve and apply a creative color grade, well, the very basics of it. However, this is a very detailed subject with way, way more than we can cover here. Below is a link to some more detailed free training from Blackmagic Design, the makers of DaVinci Resolve.
Davinci Resolve 17 Training: https://www.blackmagicdesign.com/nz/products/davinciresolve/training
Other tools
It’s worth quickly mentioning some useful tools that can save you time.
Stills
You can create stills from any of your grades by right-clicking in the viewer and selecting ‘Grab still’. This function saves a still frame along with all the grading information from that clip. You can then use these stills to apply that same grade to other clips in your project or export it and send it to an assistant or collaborator to use or save it to use in other projects.
Auto color
DaVinci Resolve has an auto color function that can analyze your footage and correct it automatically. Needless to say, this does not always give the best results, but it can give you a starting point or a solution in a rush. You will find the button at the top left of the primaries panel.
Shot match
This is a function that can really help you match clips in your timeline. You just select the clip you want to grade and right-click on the clip you want to match, then select “match this clip” from the menu. Resolve will try to match the colors from that clip, and you should end up with a reasonable baseline to work from.
About Johan
Johan Kok is passionate about visual story telling and loves the outdoors. He runs his own small video production business in Auckland, New Zealand doing mostly corporate and event work. When he has time he gets involved in local short films and other productions as well as running a small outdoor YouTube channel on the side.