Depending on your skill level and experience, editing your videos using Premiere Pro can be a daunting prospect at first. There’s a lot to unpack and get to grips with when you first start using this amazingly powerful piece of video editing software, but once you’ve mastered it, you’ll never look back. Before anything else, you’ll need to import your footage into Premiere Pro.
If this is something you’re struggling with, don’t worry. We’ve got you covered here today with all you need to know about importing footage into Premiere Pro. We’ll guide you through the basics of how to do a Premiere import, as well as taking a look at more nuanced troubleshooting. Because inevitably, at some point, you will see that infuriating message ‘the importer reported a generic error.’ Perhaps a file import failure on Premiere Pro is why you’re here in the first place? Let’s get into it!
Premiere Import
There are 3 main ways to do your Premiere Import:
1) The double-click
2) File > Import
3) Drag ‘n’ drop
We’ll take a look at each one for you.
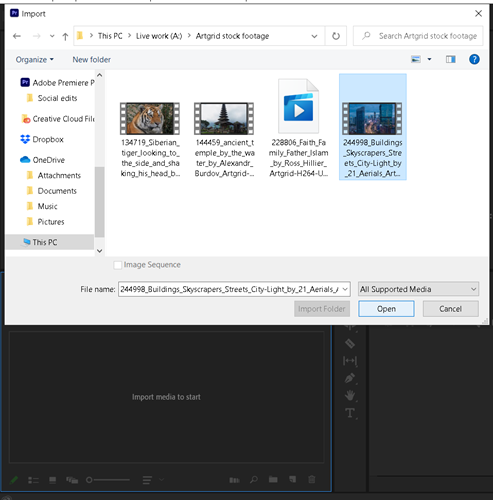
The double-click
1) In your project window, simply double click anywhere, and a File Explorer window will open. From here, you can locate the footage and any other files you want to import.
2) Select one or multiple files and hit the Open button.
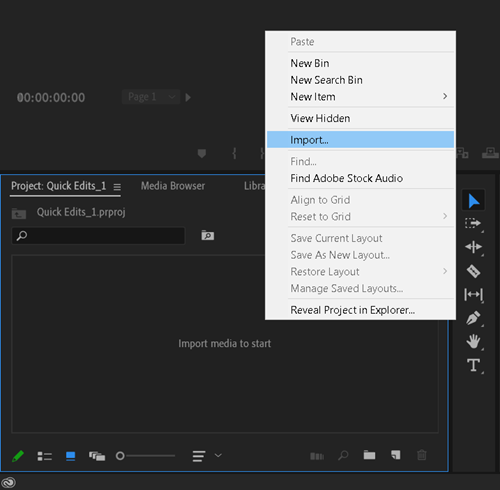
3) Alternatively, you can open the same import menu by right-clicking anywhere in the Project window and selecting Import from the drop-down menu.
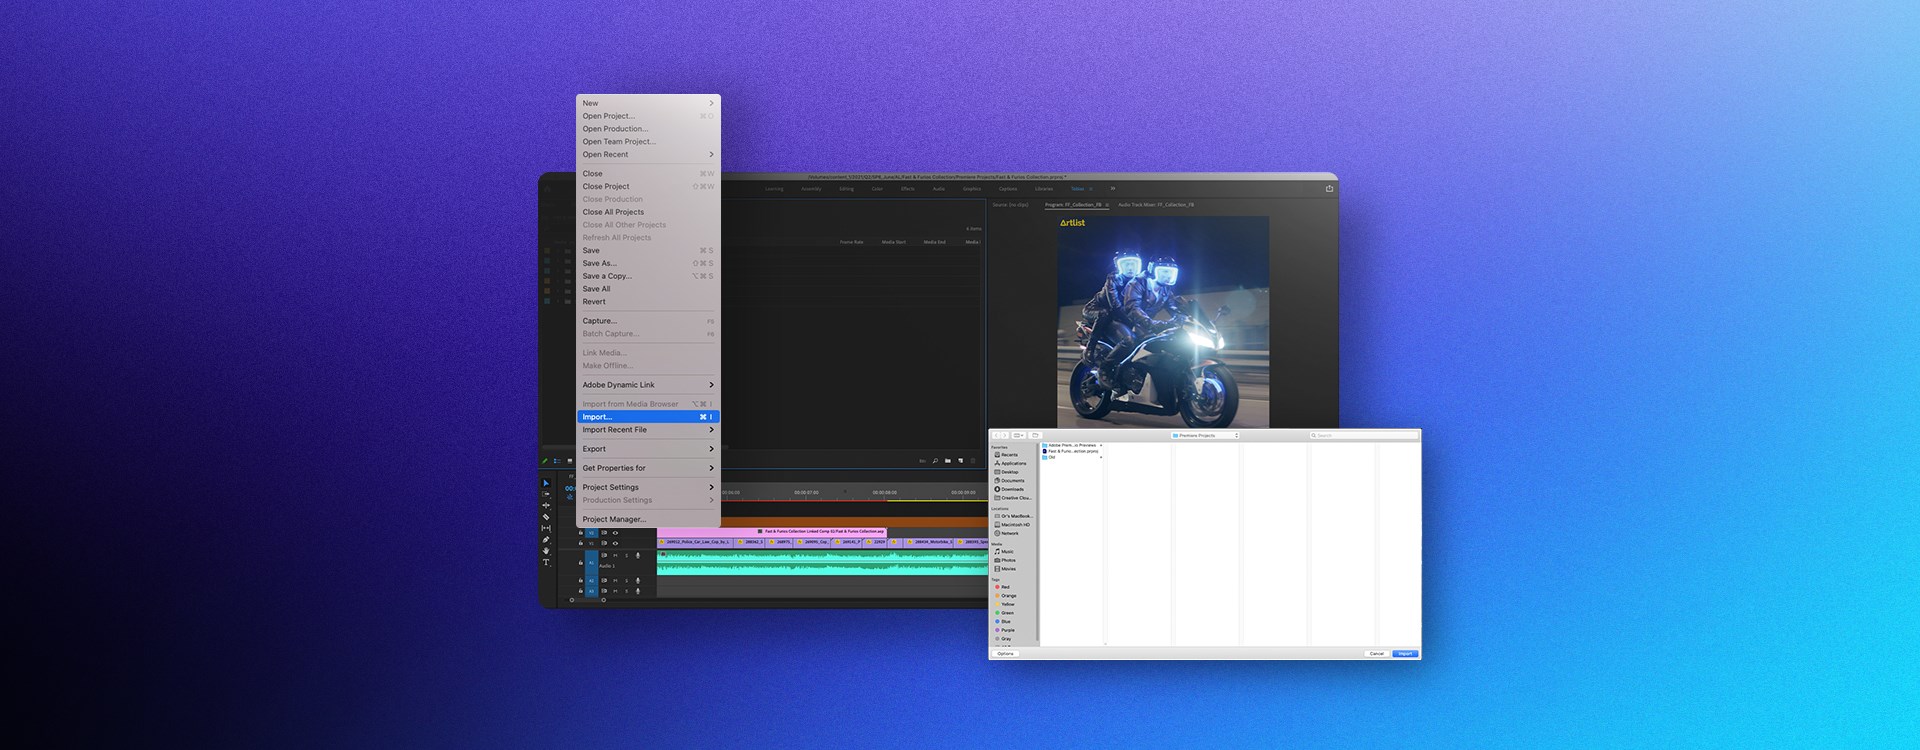
File > Import
1) At the top of Premiere Pro, select File from the toolbar.
2) Select Import from the drop-down menu, and the same File Explorer window will open, allowing you to locate the footage and files you wish to import.
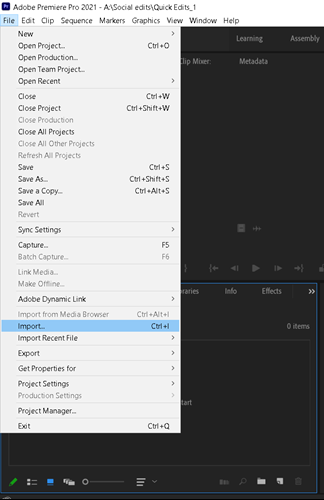
3) Select the footage and files you want to import and click the ‘open’ button.
Drag ‘n’ drop
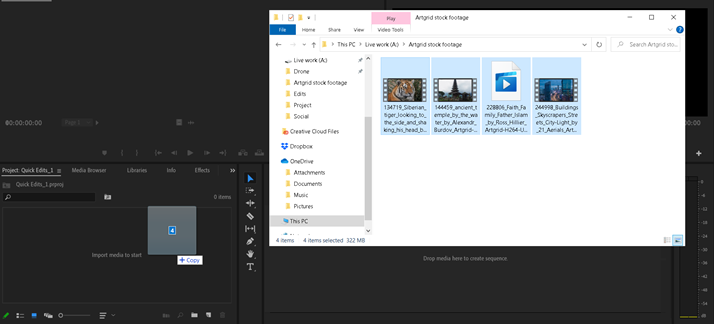
1) Alternatively, you can navigate to the location of your footage and files using File Explorer.
2) Once you’ve found the files you’re looking to import, select them.
3) Next, click and drag them into Premiere Pro. Let go of the cursor once you’re hovering over the Project window.
Unique video codecs
One of the reasons you may be experiencing the classic ‘the reporter reported a generic error’ message is that Premiere Pro isn’t recognizing the codec of the video you’re trying to import.
For example, when downloaded, a lot of YouTube videos may be saved in an MKV format. Currently, the MKV format is not recognized by Premiere Pro.
Fortunately, solving the issue of an unrecognized format like the Adobe Premiere MKV one is fairly straightforward. All you need to do is convert the file into a codec that Adobe Premiere Pro recognizes. There are 2 great programs that do this very well (and both are free!) - VLC and Handbrake.
Using either of these, you can convert something like an MKV file into an MP4 file. Plus, Adobe has a fully up-to-date list (one that changes frequently) that shows you all of the compatible video codec formats in Premiere Pro, which is worth checking out and understanding.
Importing stills
Alongside importing footage into Premiere Pro, there are also plenty of options when it comes to photos. Here are all the different types of files that are compatible with a Premiere import:
|
AI, EPS |
Adobe Illustrator |
|
BMP, DIB, RLE |
Bitmap |
|
DPX |
Cineon/DPX |
|
EPS |
Adobe Illustrator |
|
GIF |
Graphics Interchange Format |
|
ICO |
Icon File (Windows only) |
|
JPEG |
JPE, JPG, JFIF |
|
PNG |
Portable Network Graphics |
|
PSD |
Photoshop |
|
PTL, PRTL |
Adobe Premiere title |
|
TGA, ICB, VDA, VST |
Targa |
|
TIFF |
Tagged Interchange Format |
Providing your file is one of these compatible types, you can simply import it into Premiere Pro in the same way as footage. Easy!
Note - there are a few ‘best practice’ tips when it comes to a Premiere import for stills:
- Ideally, you want to set pixel dimensions to the resolution you’ll be using for your video. For example, 1080p (Full HD).
- In other words, wherever possible, ensure that your stills have a frame size that is at the very least as large as your video frame size. If you don’t do this, you’ll have to scale up the image, leading to a blurry, poorer-quality image appearing in your video.
- Ensure that your file is saved in one of the above file formats. JPEG and PNG are the most common options for stills.
- Remember, you can also import Illustrator or Photoshop files (using the same methods described above). Premiere Pro will recognize these files, and if there are areas of transparency in the Illustrator or Photoshop file, that transparency will also carry over into Premiere Pro. This is great for overlaying logos and graphics onto footage.
Fonts
Fonts are an easy one for Premiere Pro imports.
1) Download the font you wish to use.
2) Double click on the .zip file you downloaded.
3) Providing that the file is .otf or .ttf (like the vast majority of font files), your computer will automatically open the font window.
4) Click the Install button. The font will install in a matter of seconds.
5) To find the font, you will need to restart Premiere Pro if you already had it open while installing. On restart, you’ll find the font is ready to use.
Housekeeping
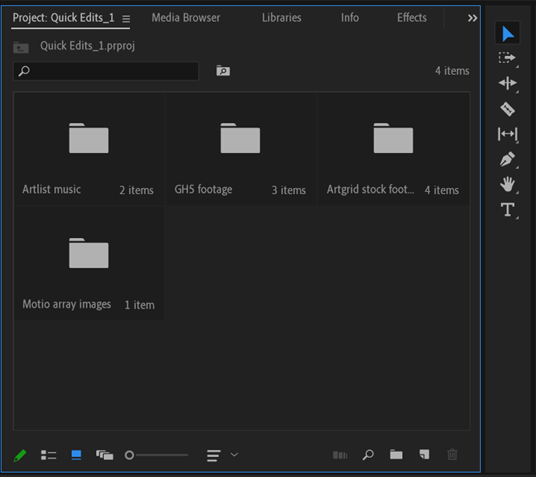
Being organized is essential in making a video, especially when it comes to editing. One of the best things you can do when carrying out a Premiere import is to ensure that your files are neatly organized in the project panel using bins. Things can become very confusing and messy quickly if you don’t.
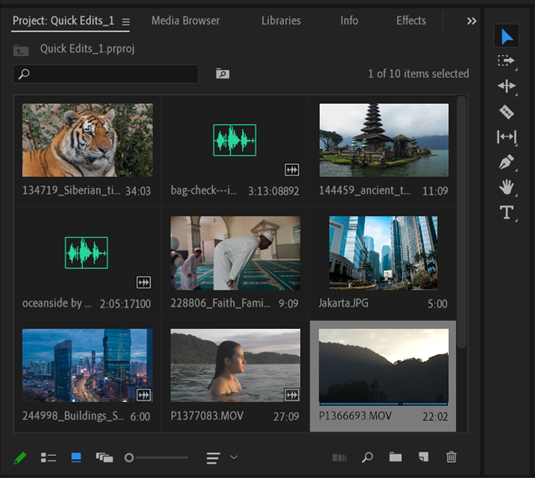
A ‘bin’ is essentially just a folder inside the project panel. For example, below, I’ve organized my files into footage from my GH5, music from Artlist, royalty-free stock footage and video overlays from Artgrid and some stock photos from motion array. This will help me navigate through my files and edit them much quicker.
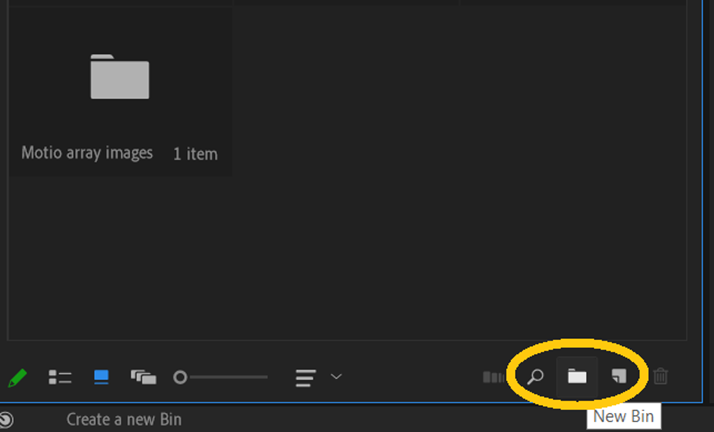
To create a new bin, simply click the New Bin folder icon at the bottom of the Project panel. This will create a new folder that you can name appropriately.
Troubleshooting (Premiere only importing audio etc., organizing footage into bins)
Look, there are always going to be teething problems with a Premiere import. You could argue that it’s an unfortunate part of the nature of editing! There’s a reason ‘premiere pro not importing video’ and ‘file import failure premiere pro’ are such frequently searched phrases on Google. Here’s what might help…
Is source patching turned on?
Before anything else, check that source patching is on. If you have an issue with Premiere only importing audio or Premiere Pro not importing video, this may well be the fix. Source patching basically lets Premiere Pro know which parts (video and audio) you would like to edit on your timeline. Here’s how it works:
1) Select your clip in the Project panel. You should see that both V1 or A1 are highlighted in blue to the left of the timeline.
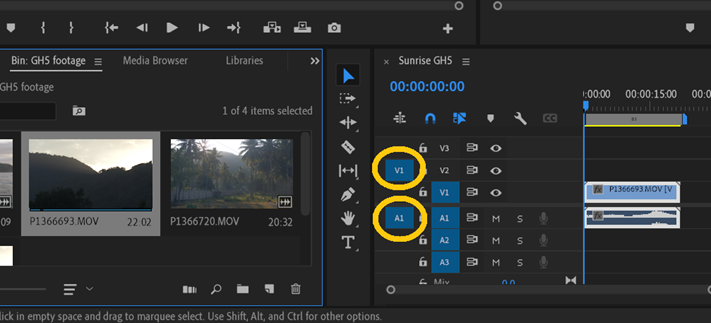
2) If one isn’t, this leads to Premiere only importing audio or vice versa, depending on which one is off and on. Simply click them to turn them on.
Keep Premiere Pro updated
It seems obvious but, it’s really important to keep Premiere Pro updated. If you’re still experiencing file import failure with messages like ‘the importer reported a generic error,’ it’s a good idea to check that you’re running the latest version of the software and stay up-to-date with the latest Adobe Premiere Pro update.
Shutdown and restart
Still having issues? Try the good ol’ shutdown and restart on your PC. Reboot your system, relaunch Premiere Pro and see if this works. You never know...
Remember to convert files to compatible codecs
As discussed above, if you’re still experiencing an issue like Premiere Pro only importing audio or Premiere Pro not importing video, it could mean that the codec isn’t being recognized by the program. You should use either VLC or Handbrake to convert your footage into something compatible with Premiere Pro.
Try clearing your media cache
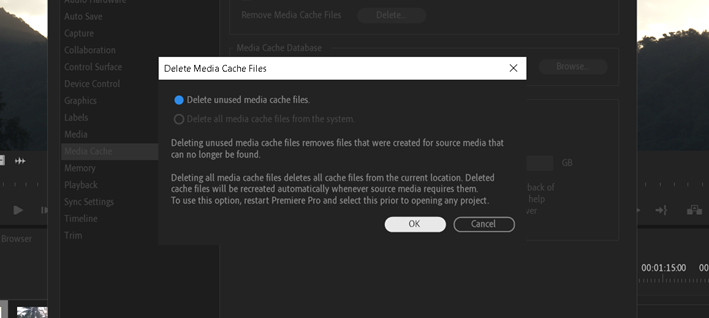
If you’re still getting a file import failure, it might be time to clear your media cache files. To do this:
1) Navigate to Edit > Preferences > Media Cache.
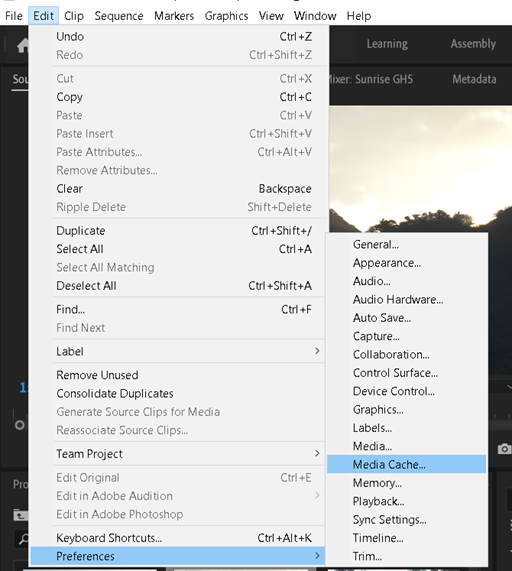
2) Select Delete and click OK.

If this doesn’t do the trick, then the problem likely lies somewhere else in the software. At this point, best to get in contact with Adobe or hit the message boards and see if others are experiencing the same issue.
Wrapping up
So, that’s the basics of a Premiere import and the different methods of importing your files into the program. We also looked at some (hopefully) helpful troubleshooting tips that may help solve some of those annoying issues you’ve been having, such as Premiere Pro not importing video and things like the Adobe Premiere MKV incompatibility. Chances are, there is an easy fix, so remember:
It happens. It’s a part of life. So relax, stay calm, follow these steps, and you’ll be alright!
The great thing about Premiere Pro is that they’re always innovating and updating the software, looking to streamline it and improve the user’s editing experience. 30 years on from its first inception and a few months after releasing its 15.0 version, a new public beta version of Premiere Pro has been released, which gives importing and other tasks a major facelift.
This latest update is designed to reflect the reality that there are now a vast array of different platforms, channels and formats out there - far more than 30 years ago. In a press release, Adobe said:
"We want Premiere Pro to become a more intuitive, yet powerful editing tool that is ready to meet the demands of tomorrow while also helping creators meet the demands of today of delivering high-quality content at quick turnarounds and optimizing content for multiple social platforms."
Of course, this latest update is still in the beta phase and subject to more fine-tuning and tweaks. Adobe says that for now, the update is “public Beta to ensure that our customers can provide feedback, explore the changes and continue to use Premiere Pro to its fullest potential. These changes are additive and not a replacement to current workflows. We understand how big of a role muscle memory plays, and we don’t want to disrupt your flow in any way."
It’s exciting to see how the software continues to develop. Watch this space for more soon!
About Josh
Josh Edwards is an accomplished filmmaker, industry writing veteran, storyteller based in Indonesia (by way of the UK), and industry writer in the Blade Ronner Media Writing Collective. He's passionate about travel and documents adventures and stories through his films. Check out his YouTube channel here.